Use HTTPS and Custom Domains for Local Development with Docker Nginx
December 11, 2020
One of the goals while developing a web application on your local machine is to try to closely mimic the production environment into which your application will eventually be deployed. There are usually tools available with whatever web app framework you are using to run the application in “production mode” locally, which usually covers items like code minification and environment variable substitution but usually not the ability to easily test the application using a custom domain with HTTPS. [Note: these instructions are tested on MacOS]
Why test HTTPS locally?
The philosophy behind wanting to test with HTTPS locally is to minimize the differences between your local environment and your production environment, where secure requests are a strict requirement. Without enabling HTTPS locally, you may have a local frontend application making requests to a local backend API application listening on a localhost (127.0.0.1) port. In this scenario you would need to have a local environment variable override of the API URL protocol in your frontend application, rather than solely an override of the domain. For security purposes, we should try to eliminate the protocol from being configurable to avoid any accidental configuration changes in other environments. If we can use HTTPS locally, then the only override configuration we need is the change in API domain between different environments.
How will we accomplish this?
- Generate our local development certificate using
mkcert - Define our custom local domains in
/etc/hosts - Mount our certificate to our Nginx Docker container
Generate Local Development Certificate
We can install the mkcert tool by using brew (if need alternate installation methods, can check out the mkcert Readme):
brew install mkcertTo initialize mkcert by creating and installing a local CA (certificate authority) run [Warning: do not share the file that this command generates, see mkcert for more info]:
mkcert -installFinally, to generate the certificate and key files for your local custom domain run:
mkcert -key-file ssl.key -cert-file ssl.crt myapp.localThis will generate the certificate for a local custom domain called myapp.local, we’ll discuss how to configure that domain in the next section.
Define Custom Local Domains
To define a local custom domain, we will need to edit our /etc/hosts file. The /etc/hosts file is a local mapping of IPAddress to Alias that overrides (or acts in absence of) your DNS. By adding a new entry to this file we can create a mapping of a custom local domain to 127.0.0.1, similar to how localhost is just an alias to 127.0.0.1:
##
# Host Database
#
# localhost is used to configure the loopback interface
# when the system is booting.  Do not change this entry.
##
127.0.0.1       localhost
127.0.0.1       myapp.local
Once you save those changes they should take effect immediately. Let’s double check our setup so far is working, before we get Docker involved. Let’s fire up a quick http server using the npm package http-server. To install it:
brew install http-serverNow let’s boot up a server using the ssl options, and point the key and cert options to the files that were generated by mkcert:
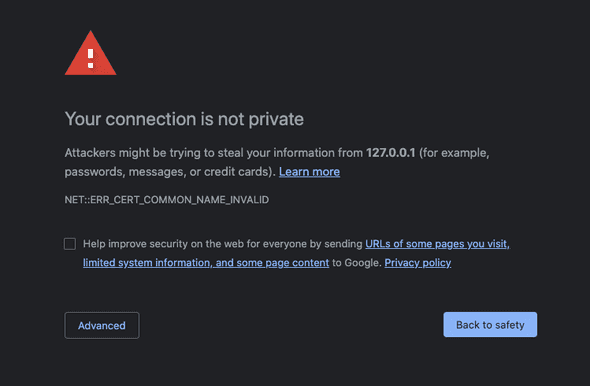
http-server --ssl --cert ssl.crt --key ssl.keyLet’s first test to see what happens if we browse (in chrome) to https://localhost:8080. You should see something similar to the following image:
This is because the certificate that we generated is solely for the domain myapp.local, and is not valid for localhost. If you now browse to https://myapp.local:8080 you will now see that chrome accepts the certificate.
Mount Development Certificate in Nginx Docker Container
Now that we have a working local certificate with a custom local domain, how can we plug that into a system that uses docker containers? If we include the generated certificate files inside of the container by mounting a shared volume, Nginx will be able to access and load the certificate. In this scenario we will have SSL termination at Nginx layer, which will then proxy to another container running http-proxy:
conf/myapp.local.conf
server {
  listen 443 ssl http2;
  listen [::]:443 ssl http2;

  ssl_certificate /etc/nginx/ssl/ssl.crt;
  ssl_certificate_key /etc/nginx/ssl/ssl.key;
  ssl_protocols TLSv1.2;

  location / {
    proxy_pass http://http-server:8080;
    proxy_set_header Host $http_host;
    proxy_set_header X-Real-IP $remote_addr;
    proxy_set_header X-Forwarded-For $proxy_add_x_forwarded_for;
    proxy_set_header X-Forwarded-Proto $scheme;
  }

}
docker-compose.yaml
version: "3.9"
services:
  nginx:
    image: nginx:latest
    ports:
      - 443:443
    volumes:
      - ./certs/:/etc/nginx/ssl
      - ./conf/:/etc/nginx/conf.d
  http-server:
    image: node:15-slim
    command: bash -c "npm install -g http-server && http-server -a 0.0.0.0"
    ports:
      - 8080
We will leverage docker-compose to spin up an nginx container with mounted volumes to handle our nginx config file (for proxy settings and ssl cert locations) and spin up a node.js container with http-server installed. In the nginx proxy settings, we can use the host http-server since docker-compose registers that service in the docker network with that alias. If we move our generated certs into a directory certs/ then we can spin up our containers:
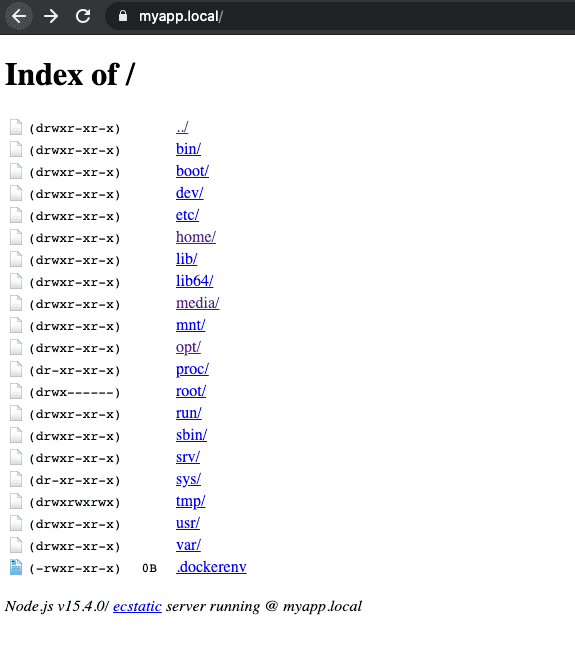
docker-compose upIf you now navigate to https://myapp.local in your browser you should see the response from your http-server in the nodejs container, should looks something like this:
And that’s it! If you’d like to try these out yourself you can check out this example repo with all the previously mentioned code, and a wrapper script that runs all the necessary steps.

